Quick Start Guide:
- Click "Get arcOS Now!" to download the ISO image from SourceForge
- Download the checksum file
- Verify the SHA256 checksum of the ISO to ensure the file is not corrupted by comparing the downloaded checksum file to the calculated value from the command(s) below:
- From a Linux system, calculate the SHA256 checksum with the following command:
user@host:~$ sha256sum /path/to/downloaded/iso/file.iso- From a Windows system, calculate the checksum with the following command:
- Open the Windows command line. Press Windows + R, type "cmd" and press Enter.
certutil -hashfile C:\Path\To\Downloaded\ISO\File.iso SHA256
Using an appropriate tool, write the ISO image to the USB drive.
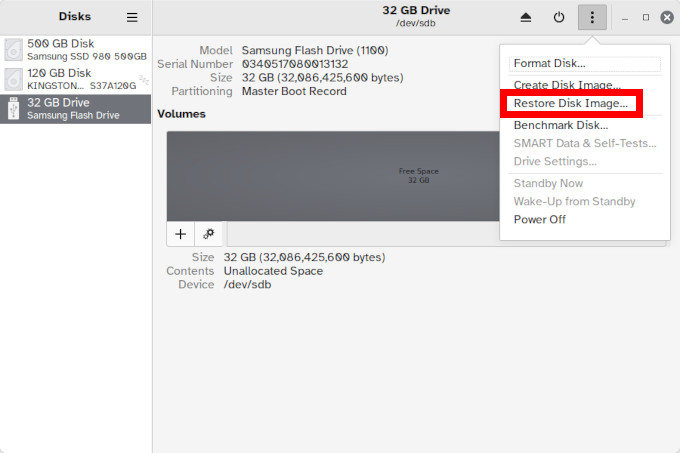
On Linux systems with the GNOME "Disks" utility installed, use the "Restore Disk Image" option, and select the arcOS ISO as the "Image to Restore."
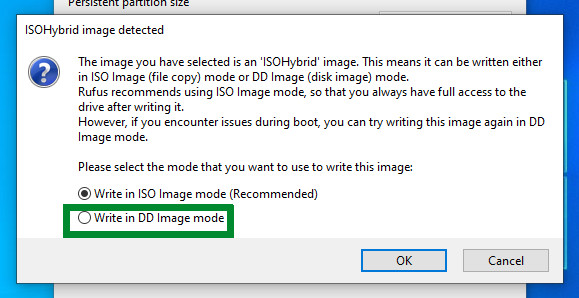
Note: If using Rufus in Windows to write the ISO image, be sure to use the "DD" method, with no other changes to the recommended defaults.
Enable USB boot devices in the BIOS of the computer. There are many different computer manufacturers, and the keystrokes required at boot time to enter the BIOS settings vary. A quick web search of the manufacturer and model should provide the information needed to gain access (usually, pressing an F1-F12 key).
Once configured to boot from USB devices, save the settings, and power off the computer. Insert the arcOS USB drive, and power on the computer to boot arcOS from the USB drive.
Once booted into arcOS, follow the prompts, and you will be ready to go in moments!
Note: Secure Boot, Fast Startup, and BitLocker may hinder booting a Windows machine from a USB device. Secure Boot settings are in the machine BIOS. Fast Startup settings must be changed from within Windows.